Showing posts with label recipes. Show all posts

7.14.2011

Cake Pops

Have you seen these at Starbucks and wondered, "how do they make those?"


Well, wonder no longer. I am here to tell you.
My friend and I made these for her going away party (I know...she wanted to do it!) and it was super easy!
We made two different kinds - chocolate cake pops with milk chocolate coating and strawberry cake pops with (blue) white chocolate coating.

Ingredients: 
1 box regular cake mix, any kind you want
(and whatever ingredients necessary to make the cake)
1 tub of frosting (any kind - we used cream cheese)
1 package of Wilton's candy melts (we got them at Michaels*they have all kinds of colors!)
(here are some tips on how to use these, clean up etc)
Various Sprinkles
Lollipop Sticks (also from Michaels)
Cello Bags (I think they are 3" x 4" but am not positive)
Ribbon
Styrofoam board (to keep pops upright while drying)
source
{1}
Bake the cake. Once it's cool crumble it up into a bowl. 
Add half of the frosting. Mix well.


{2)
Roll the mixture into balls. Put on a cookie sheet. Leave in fridge for at least an hour or, even better, overnight. We were on the fast track cake pop making, so we put them in the freezer for about 20 minutes. It worked but I would recommend just making them the night before. 


{3}
Melt the candy melts. To do this, bring a pot of water to a simmer and put a mixing bowl with the candies on top of the pot, kind of a double boiler method. 


{4}
Put the lollipop sticks into the bottom (flatter part) of the cold cake balls and then dip them into the melted chocolate. (HINT: if the chocolate is a little thick, you can add a little bit of vegetable oil to it to thin it out) I don't know if it's becuase we did the fast freezer method, but the balls kept wanting to fall off the stick, so do it as quickly as you can. Don't shake the stick either. We found that if there is too much chocolate, just give it a light twirl to even it out.

{5}
After dipped, add sprinkles and put them one by one into the Styrofoam board to cool/dry. 


{6}
Once dry, we transfered them to a plate to fit new ones in the "cooling rack". We also used a fan, you can kind of see it in the photo above. But don't set it too high or the melted chocolate will go everywhere! 


{7}
Put them in the cello bag. 
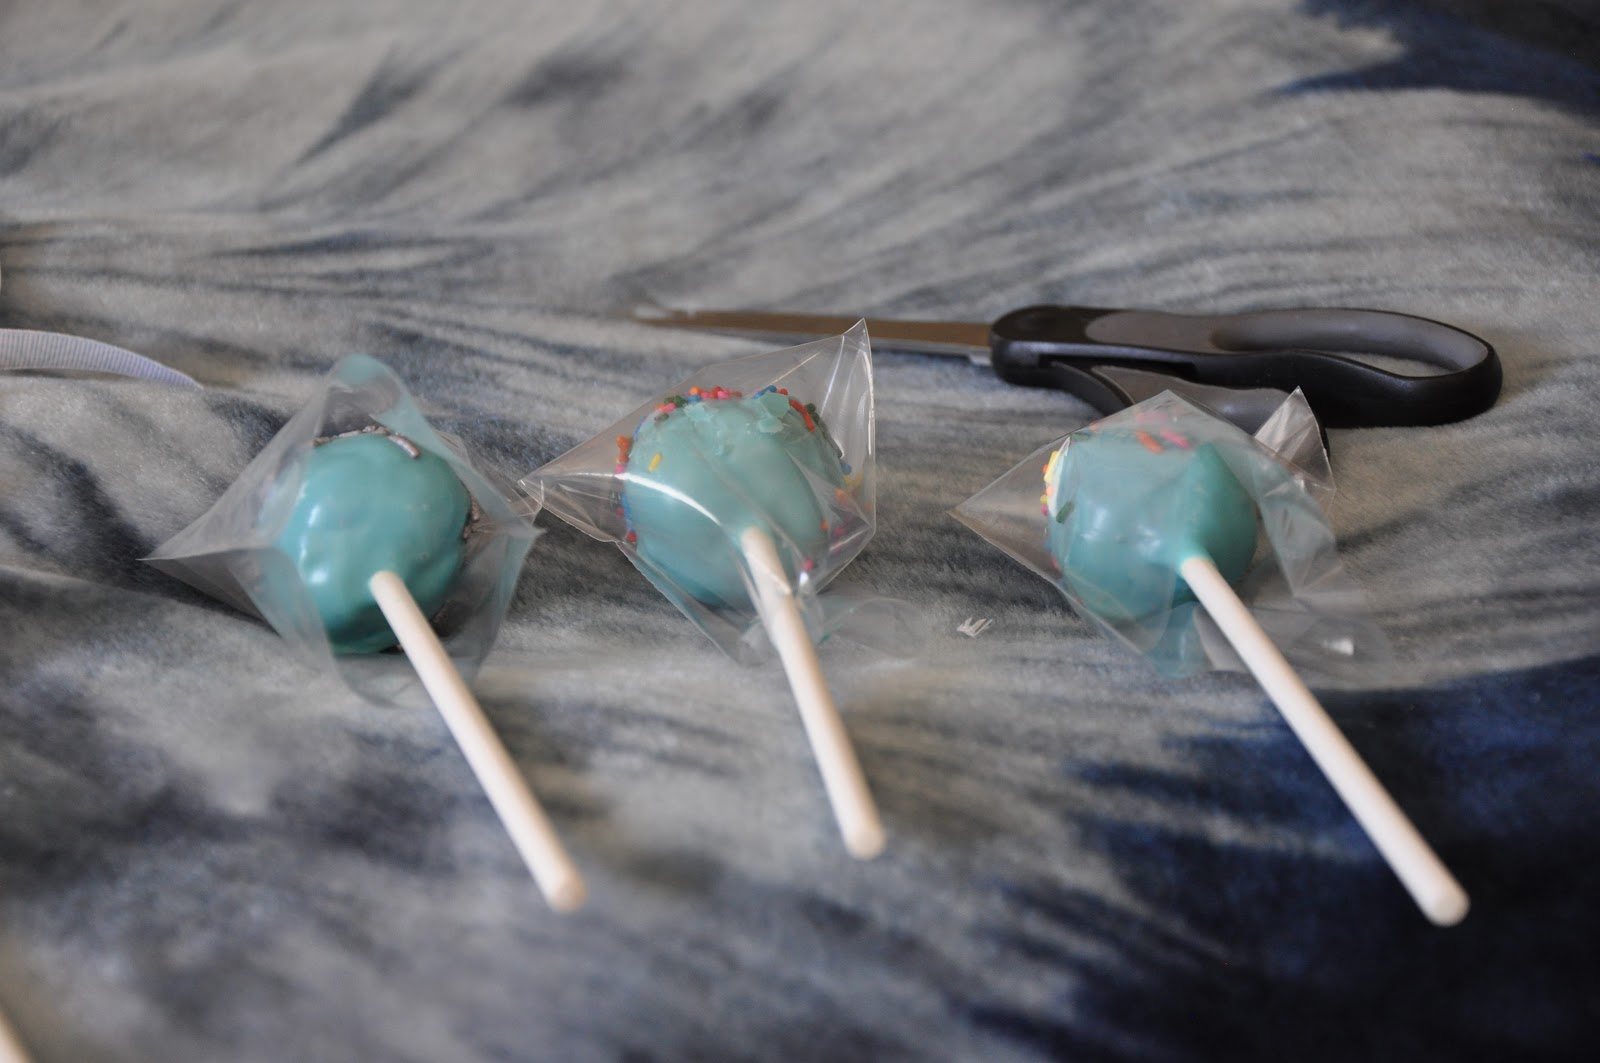

{8}
Tie a ribbon on the bag and VOILA. Cake pops!


Here they are, hanging out at the party!
Okay, so if you think the ones we made are cool, check out some of these: 
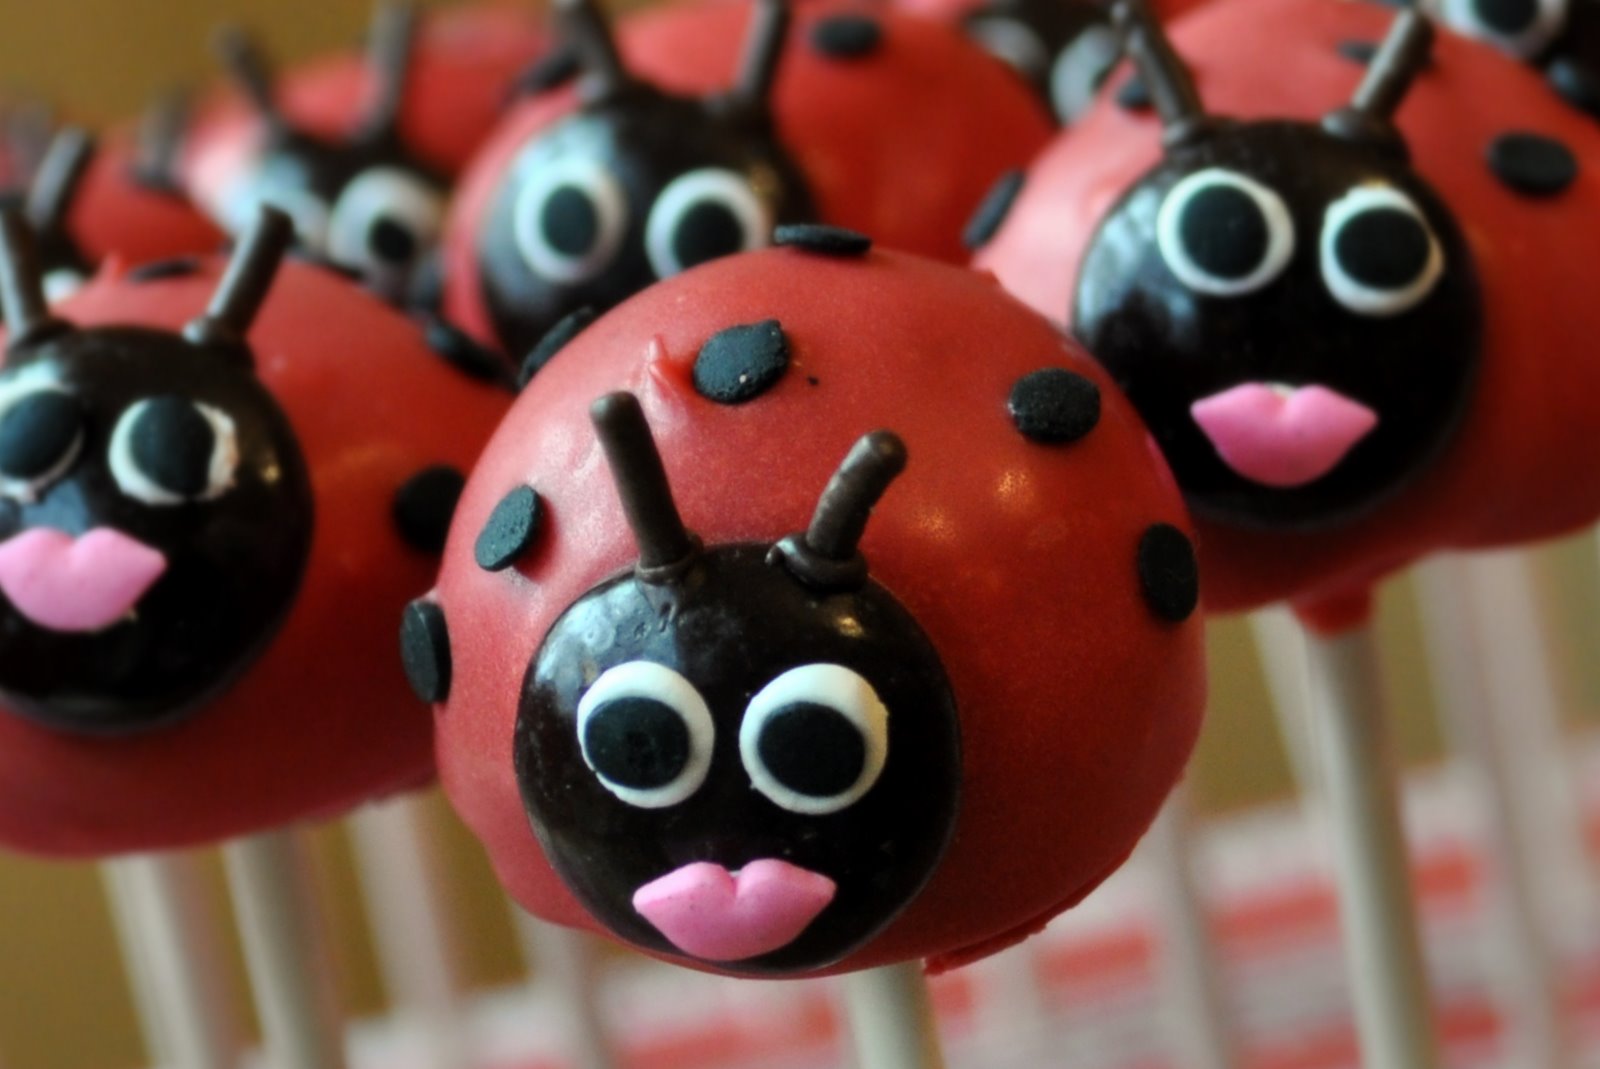
source
source
source
**Also if you don't want to mess with pops, you can make cake BALLS: 

source
Enjoy your Pop and Ball making!

Have you ever made cake pops? Do you have an "go to" thing you usually make for parties?

7.07.2011

No Work Chili

There are many ways you can make this. Add whatever you want! Sometimes I use real beans. Sometimes I make it with a ton of veggies (almost like soup). Sometimes I use veggie meat or ground turkey instead of beef. However, this time I did it the quick and dirty way, which, if you are short on time, is a great way to have a hearty meal with barely any work. Also, as a bonus, this is fairly low in calories and fat, depending on serving size (see stats at bottom). AND it’s gluten, dairy and nut free. AND it’s cheap and easy. What more can you ask for?

INGREDIENTS:
1 lb ground beef
1 medium onion, rough chopped (don’t waste time making tiny pieces!)
1 clove garlic, rough chopped
Salt and Pepper to taste

1 can each (usually 16 oz) of:
Black Beans
Kidney Beans (or any bean you want! I also like pinto if I do it fresh)
Corn
Diced Tomatoes
Olives
Mexican Tomato Sauce (Salsa de Chile Fresco or Jalapeno Salsa. I use El Pato. It comes in an 8 oz can)

Quack, quack. This gives it a little kick!
(optional: green bell peppers, real jalapenos, cayenne pepper)

In a large pot (big enough for everything), brown hamburger meat with onions and garlic.

Once hamburger is cooked, add all cans of everything, including liquids.

Cook for about 2-3 hours, or longer if you want.

Eat it! I usually like it even more the 2nd day which works with this recipe, since it makes a lot. 

Yummy! (as you can see, I don't even cut the olives. Super lazy!)
Makes: 15 x 2/3 cup servings
1 serving = 183 cal/4.9 g fat/22.8 carb/14 g protein.

Cost: $0.49/serving.

(** or 10 x 1 cup servings. Nutrition for 1 c serving:  274 calories. Cost: $0.73/serving)

This post is being linked up with:

Weekend Bloggy Reading

3.13.2011

Curry Me Green

Have I mentioned I like food? At home I cook as much as I can and I definitely miss that while I am abroad. I miss being able to just open the fridge and get out a snack, instead of having to go out and "forage" for food, to work for it. I miss having cheese at the ready and eating hunks of it out of the fridge without a cracker, whenever I want. I miss coffee, endless amounts of it with fresh milk.

However, even though there is no cheese here, there are so many other great foods in Asia! Below is a photo one of the great Thai foods, Green Curry with Chicken. I could eat this, and Pad Thai, every day. I found a great recipe here, where there are also many other great Thai recipes.

This Thai Green Curry Chicken recipe features chunks of tender chicken simmered in a homemade green curry sauce along with healthy vegetables (zucchini and red bell pepper). The result is a gourmet-style Thai green curry that is very aromatic and beautiful to serve (great for entertaining!). The key to good green curry is in not only using the right ingredients, but knowing when to add them. Because this curry is made the same as in Thailand (on your stovetop), I recommend using only smaller pieces or cuts of chicken, allowing for faster cooking and the freshest possible taste. ENJOY!
Prep Time: 25 minutes
Cook Time: 20 minutes
Total Time: 45 minutes
Yield: Serves 2 to 3
Ingredients:
  • GREEN CURRY PASTE:
  • 4 small green Thai chilies, OR substitute 1 to 2 jalapeno peppers
  • 1/4 cup shallot OR purple onion, diced
  • 4 cloves garlic, minced
  • 1 thumb-size piece galangal OR ginger, grated
  • 1 stalk lemongrass, sliced thinly OR 3 Tbsp. frozen prepared lemongrass
  • 1/2 tsp. ground coriander
  • 1/2 tsp. ground cumin
  • 3/4 to 1 tsp. shrimp paste
  • 1 cup fresh coriander/cilantro leaves and stems, chopped
  • 1/2 tsp. ground white pepper (can be purchased at some supermarkets, OR at Asian food stores)
  • 3 Tbsp. fish sauce
  • 1 tsp. brown sugar
  • 2 Tbsp. lime juice
  • CURRY INGREDIENTS:
  • 4 kaffir lime leaves (can be purchased frozen at most Asian food stores)
  • 2 Tbsp. oil for stir-frying
  • 1 to 1.5 lbs. (about 0.7 kg) boneless chicken thigh or breast, cut into chunks
  • 1 can coconut milk
  • 1 red bell pepper, seeded and cut into chunks
  • 1 zucchini, sliced lengthwise several times, then cut into chunks
  • Generous handful of fresh basil
Preparation:
For lemongrass tips, see: Buying and Preparing Fresh Lemongrass.
  1. Place all the "green curry paste" ingredients together in a food processor, and process to a paste. If necessary, add a few Tbsp. of the coconut milk to help blend ingredients. Set aside.
  2. Prepare the lime leaves by tearing the leaf away from either side of the stem. Discard the central stem. Then, using scissors, cut leaves into thin strips. Set aside.
  3. Warm a wok or large frying pan over medium-high heat. Add the oil and swirl around, then add the green curry paste.
  4. Stir-fry briefly to release the fragrance (30 seconds to 1 minute), then add 3/4 of the coconut milk, reserving 2-3 Tbsp. per serving portion for later.
  5. Add the chicken, stirring to incorporate. When the curry sauce comes to a boil, reduce heat to medium or medium-low, until you get a nice simmer.
  6. Cover and allow to simmer 3-5 more minutes, or until chicken is cooked through. Stir occasionally.
  7. Add the red bell pepper and zucchini, plus the strips of lime leaf, stirring well to incorporate. Simmer another 2-3 minutes, or until vegetables are softened but still firm and colorful.
  8. Do a taste-test for salt, adding 1-2 Tbsp. fish sauce if not salty enough. If you'd prefer a sweeter curry, add a little more sugar. If too salty, add a squeeze of lime or lemon juice. If too spicy, add more coconut milk. Note that this curry should be a balance of salty, spicy, sweet and sour, plus bitter (the bitter is found in the fresh basil garnish).
  9. Serve this curry in bowls with rice served separately, allowing guests to add their own. Top each portion with fresh basil, then drizzle over 2-3 Tbsp. coconut milk, and ENJOY!